Photography 101

When you’re first starting out with any type of digital camera, it’s important to have a grasp on the basics of each of your settings. Every camera’s interface is different, but the core elements of digital photography remain the same. Auto-mode can only get you so far, and most of the cool shots you probably want to take require understanding what all these values mean. Here, we give you a rundown of common settings, and their purpose.
ISO
In film and digital photography, the ISO is set number which indicate the amount of light you allow in the cameras film or digital sensor. This camera settings are commonly the first set when shooting manually. ISO regulate the camera sensors sensitivity to its external environment. Camera ISOs can range from 100 ISO - 32000 ISO.
The increase in ISO value increases how sensitive the camera’s sensor is to light.
Generally, in good lighting conditions such as during the day the sunlight is detectable by camera sensors. With large amounts of natural light the camera sensor is able to obtain into its sensor ISO settings are set to 300 ISO and less.
During night time photography, a higher ISO is typically needed. If you need it, you can shoot above 2000 ISO to give an increase in light exposure. But surpassing the typical ISO settings can often lead to a phenomenon known as “Noise”. It is described to be the grain like features attributed to the photograph in places light was overexposed. It is vital to establish a standard ISO for the environment then manipulate the aperture and shutter speed to improve light exposure.
Shutter Speed
Also regarded as exposure time, this fraction of time set in your camera settings are similar to the human eye lid. It is the fraction of time where the camera sensor is receptive of light. This set fraction of time is the evaluation of how long the camera shutter remains open & closed.
Shutter speed is measured in fractions of a second. Shutter speeds are set to fractions of 1/800 - 1/1000 during the composition of a quickly moving subject including a vehicle or sports performance & wildlife. The quality of the image are often sharper and provide more contrast.
Everyday photography is normally shot around 1/100 to minimize the effects of motion blur. Settings such as ¼, or 1/250 are slower shutter speeds that are generally used with a tripod to avoid motion blur.
Settings in this range will increase the luminosity and saturation of colors in the image.
Sometimes, when shooting at night, you may need shutter speeds over 1 second. You can also explore if your camera has a bulb mode feature that manually controls the camera shutter opening and closing. This feature is can also be used when taking time lapse photos.
Aperture
Aperture has one of the largest influences on your photos.
In photography, aperture is described in measurements called f-stops. The f-stop is the current size of aperture of the camera. As the f-stop number increases, it allows less light into the sensor and reduces the focal depth of field inside the composition.
An aperture of f-22 would be a narrow glance through the lense, where as f-1.4 provides a large spectrum of light to be brought to the image sensor, increasing the exposure of the shot.
It’s important to be mindful of aperture, since it has a great impact on the depth of field in your photo. F-16 would bring a balance to the foreground and background, thus increases the intensity and clarity of all focal points of the image. F-2 would provide focus to objects in the foreground (front) creating a depth of field to objects in the background.
How do you know how these settings interact with each other?
With most modern DSLRs you can flip between manual modes where you can experiment with only changing the aperture speed, or shutter speed. For most beginners this is a great way to further understand what your shots require, and what effects changing a single setting can have.
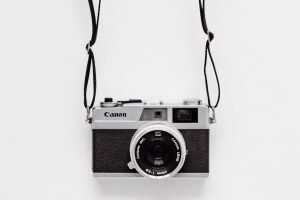
Don’t be afraid to try out your DSLR’s manual mode. If you take a photo in auto-mode, and you love how it turned out, open up the photo-file on your computer, and take a look at the meta-data. You can also do this directly inside some select cameras (many Canon models allow for this). You should be able to see the shutter, ISO and aperture settings that were used. That way you can replicate it once you’re comfortable enough in manual-mode.
Another method to further your knowledge is to take landscape photos on manual mode, as well as auto-mode. Landscapes are great for this since they’re not going anywhere so you have time to learn and play around with settings. First try taking a photo on auto, then switch to manual and see how your shot compared.
Hopefully this brief overview of these principal camera functions will help you out!
-- article by: Marc Bowler